Build a Training Plan with Crimpd+
How to build a custom training plan with skill templates and workouts
As part of an active Crimpd+ membership, subscribers have access to the custom training plan builder feature which allows you to create and manage your own training plans. Building a training plan typically consists of 4 primary steps:
- Create a training plan
- Add workouts and skill templates to your plan
- Adjust the weekly volume and training plan phases
- Structuring your weeks
1 Create a training plan
When starting to build your training plan, there are two methods you can use: start with a pre-existing Skill Template to help bootstrap your plan or create a training plan from scratch.
You will need to decided what you want to train. What are your goals? What are your weaknesses? What is your current training level? How much time do you have to train? These are all questions you should ask yourself before starting to build your plan.
Option 1: Start with a Skill Template
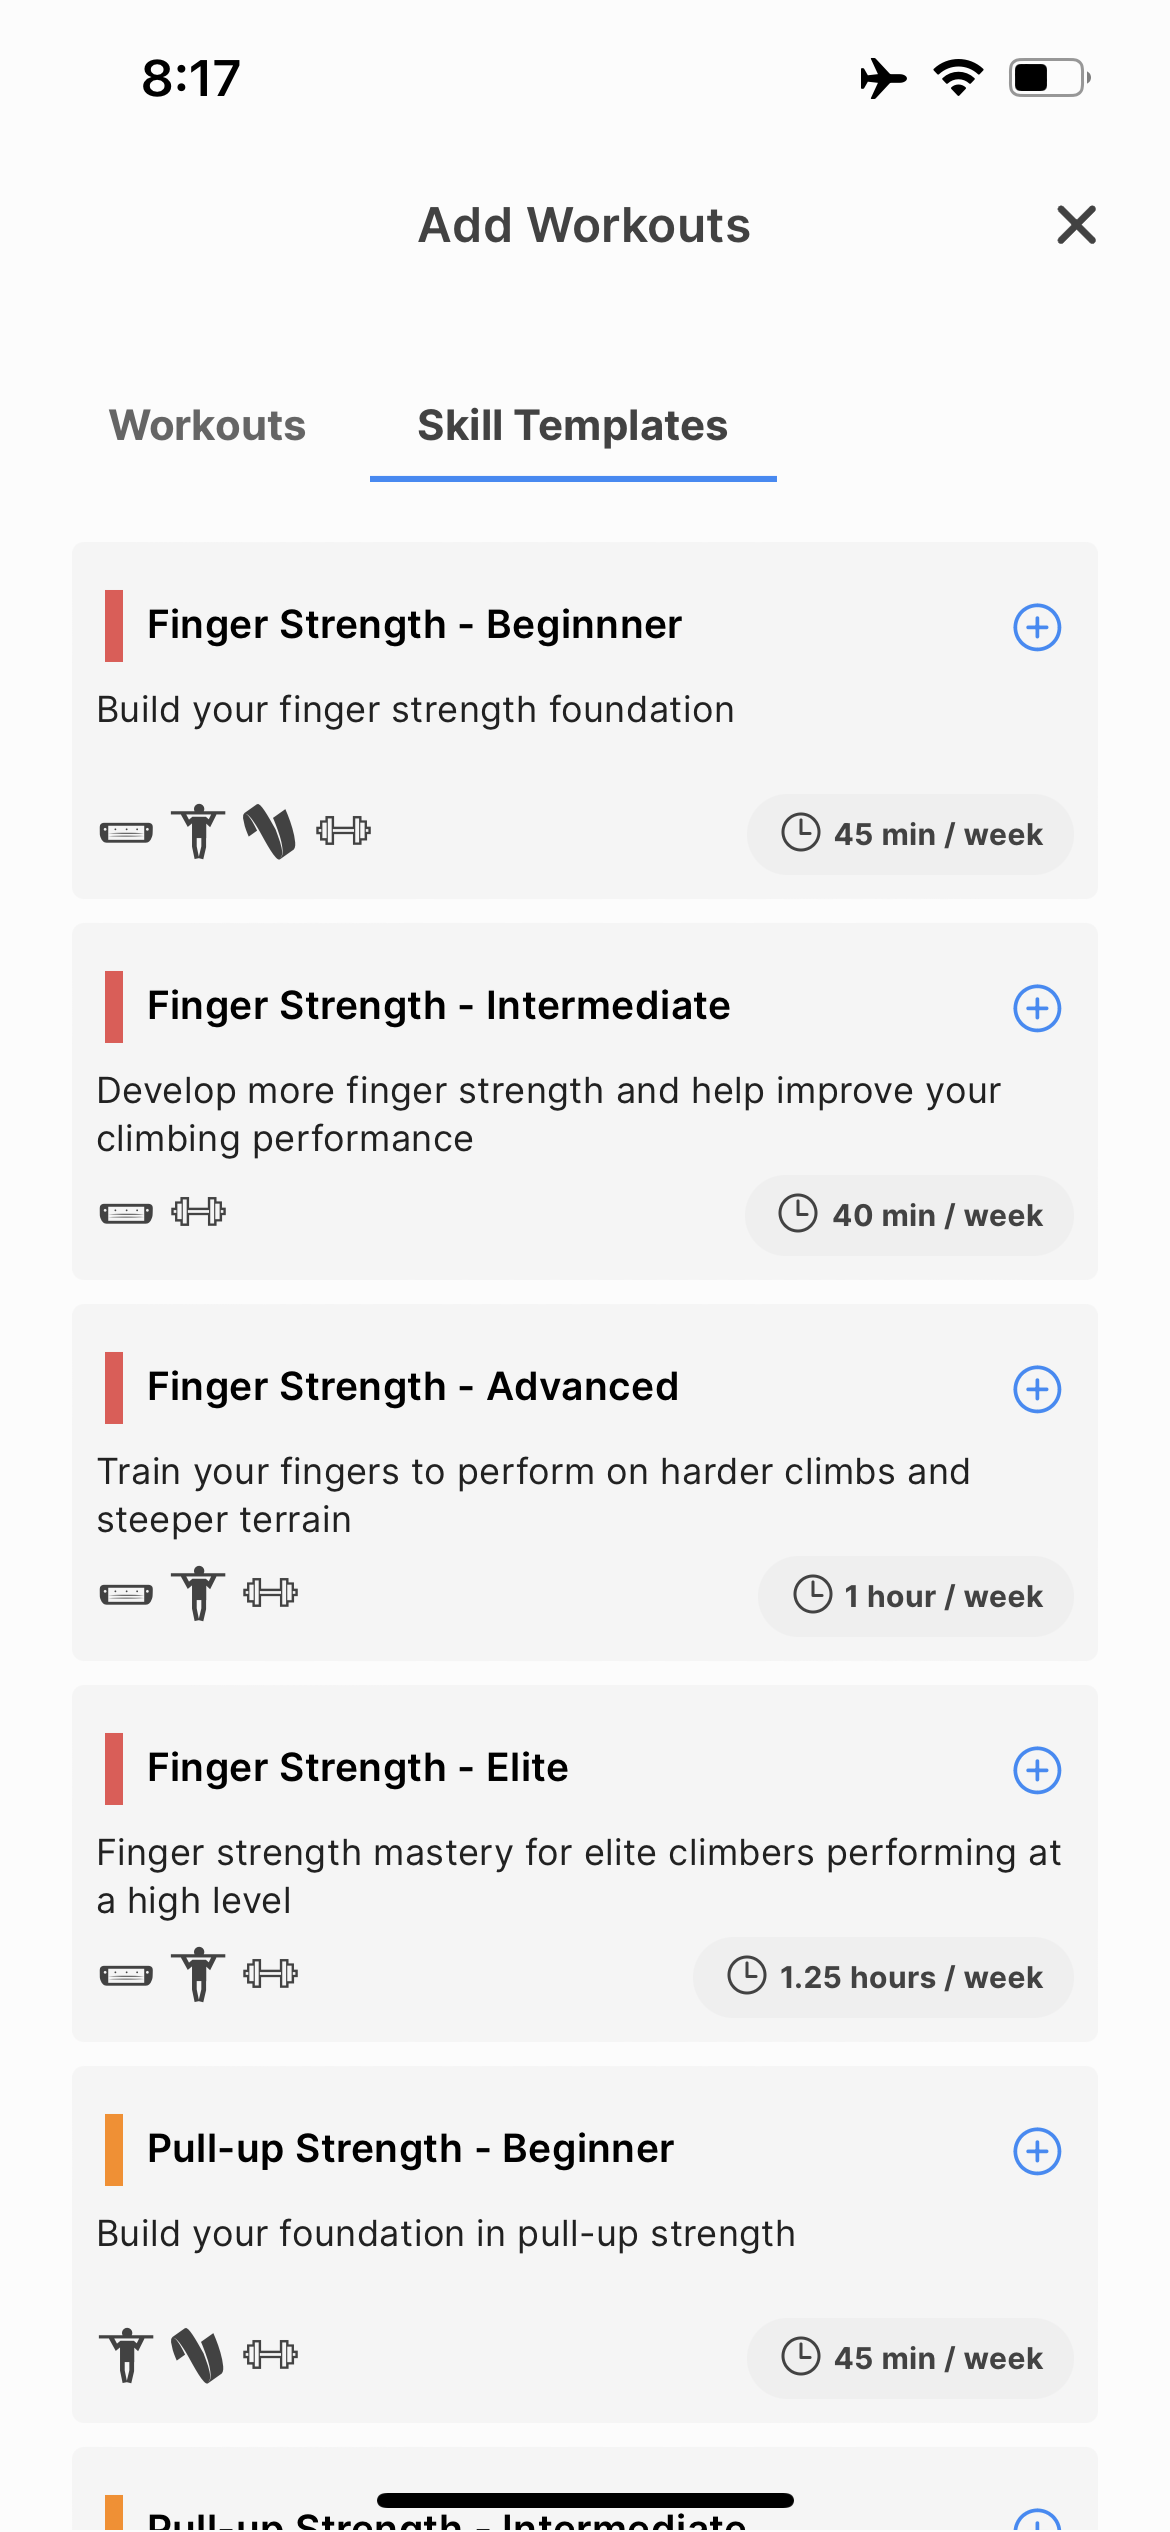
Skill Templates are a feature included with Crimpd+ memberships that are designed to help climbers bootstrap their training by offering guidance on how to improve a specific skill relevant to climbing performance. Skill templates can be found on the Training Plan tab of the Crimpd app
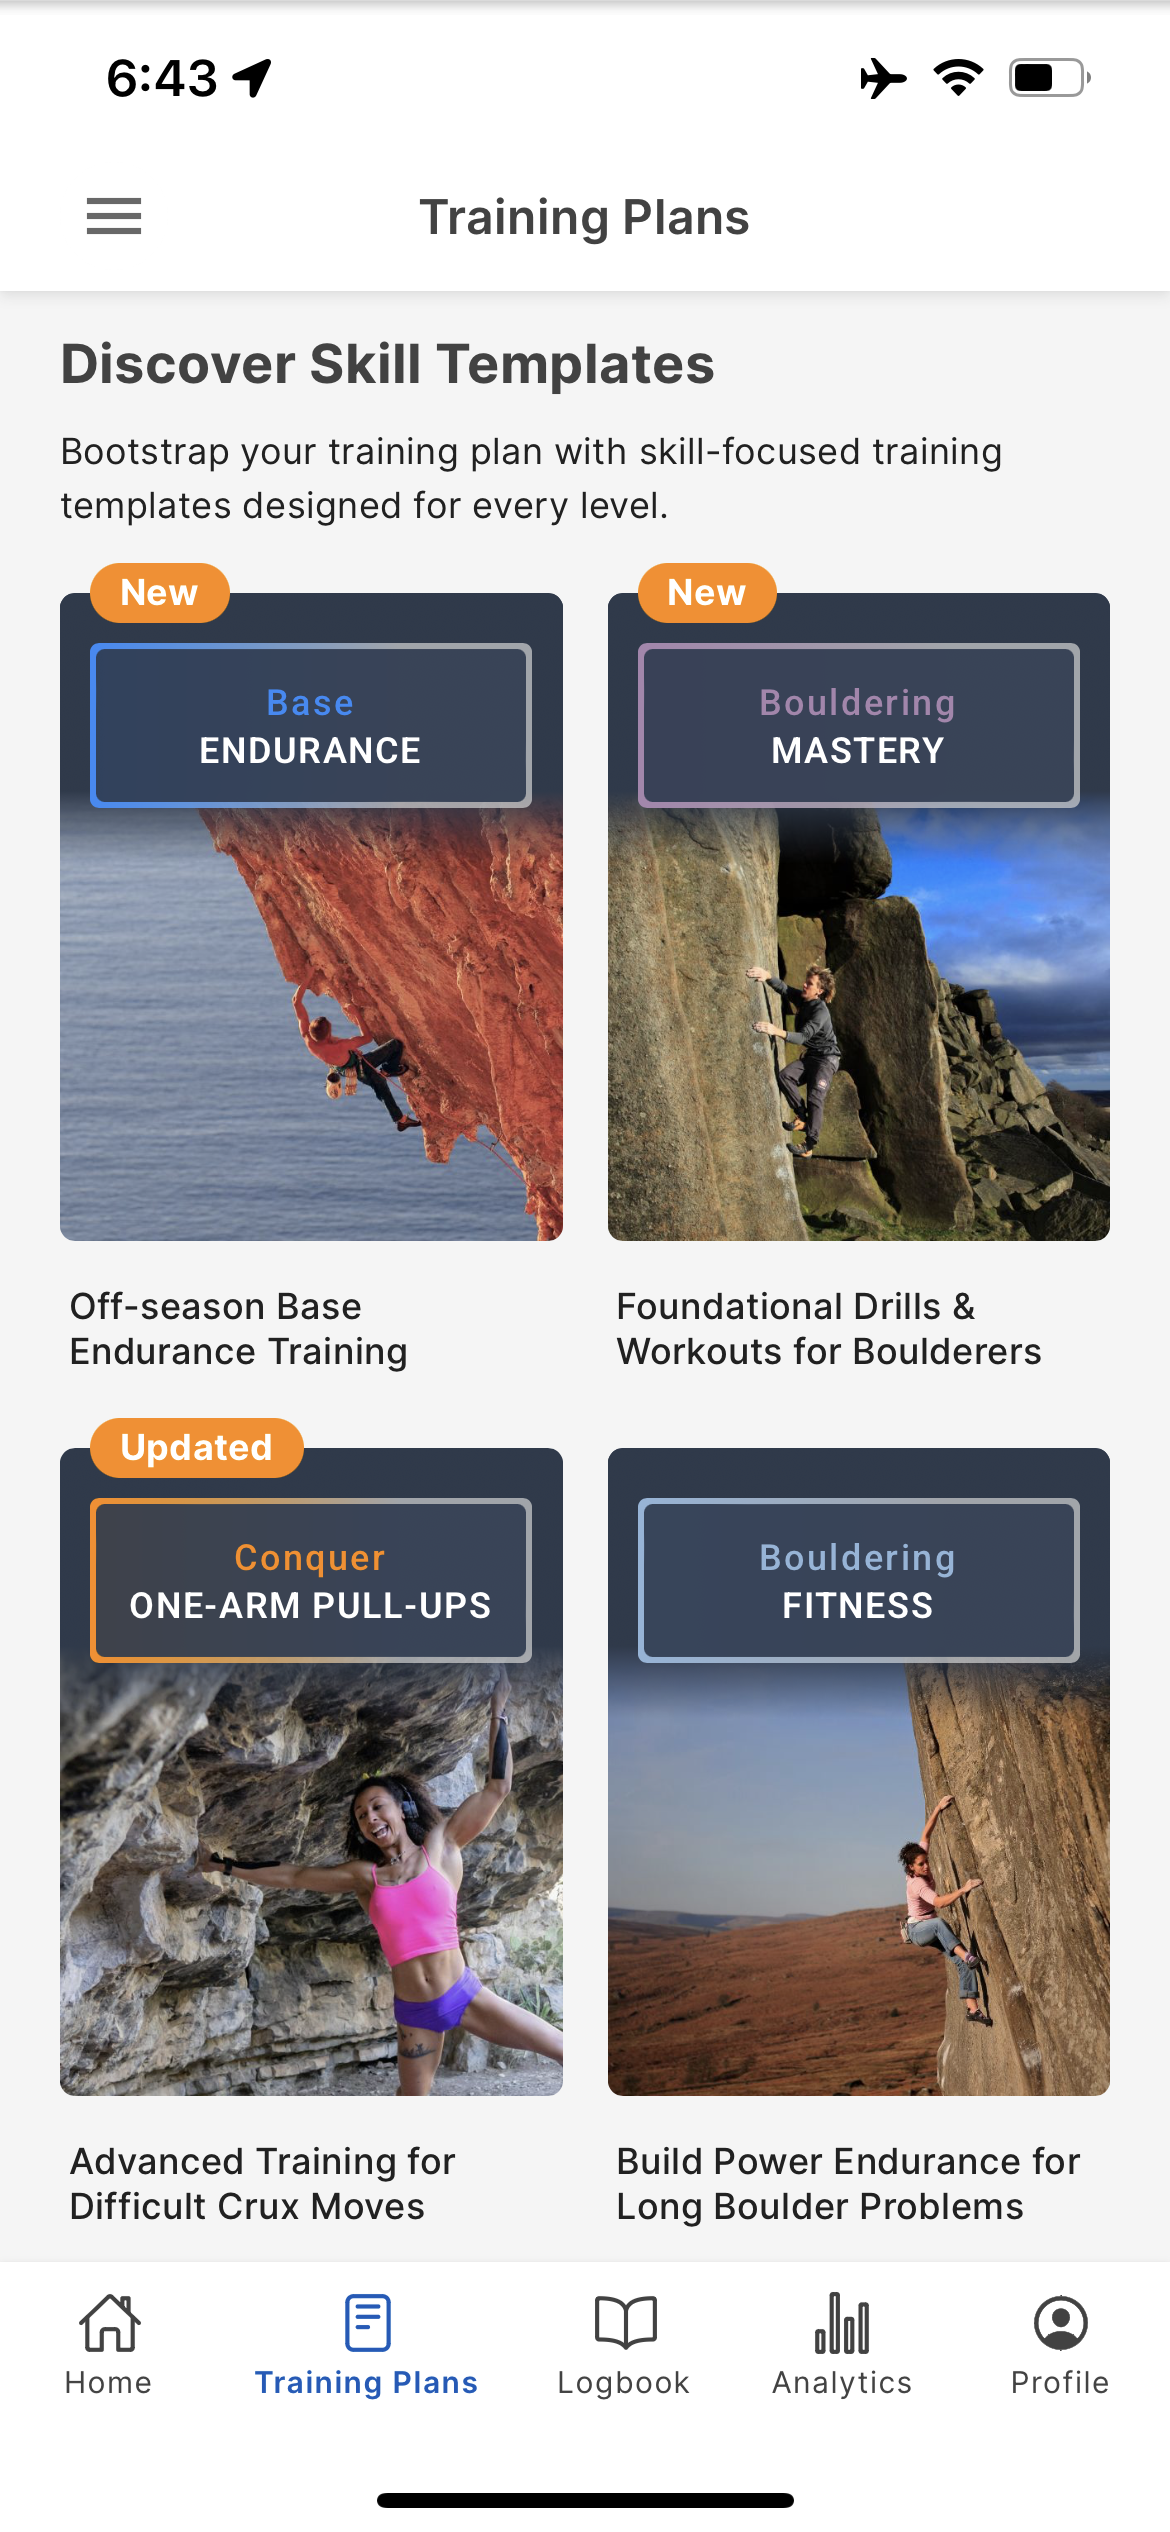
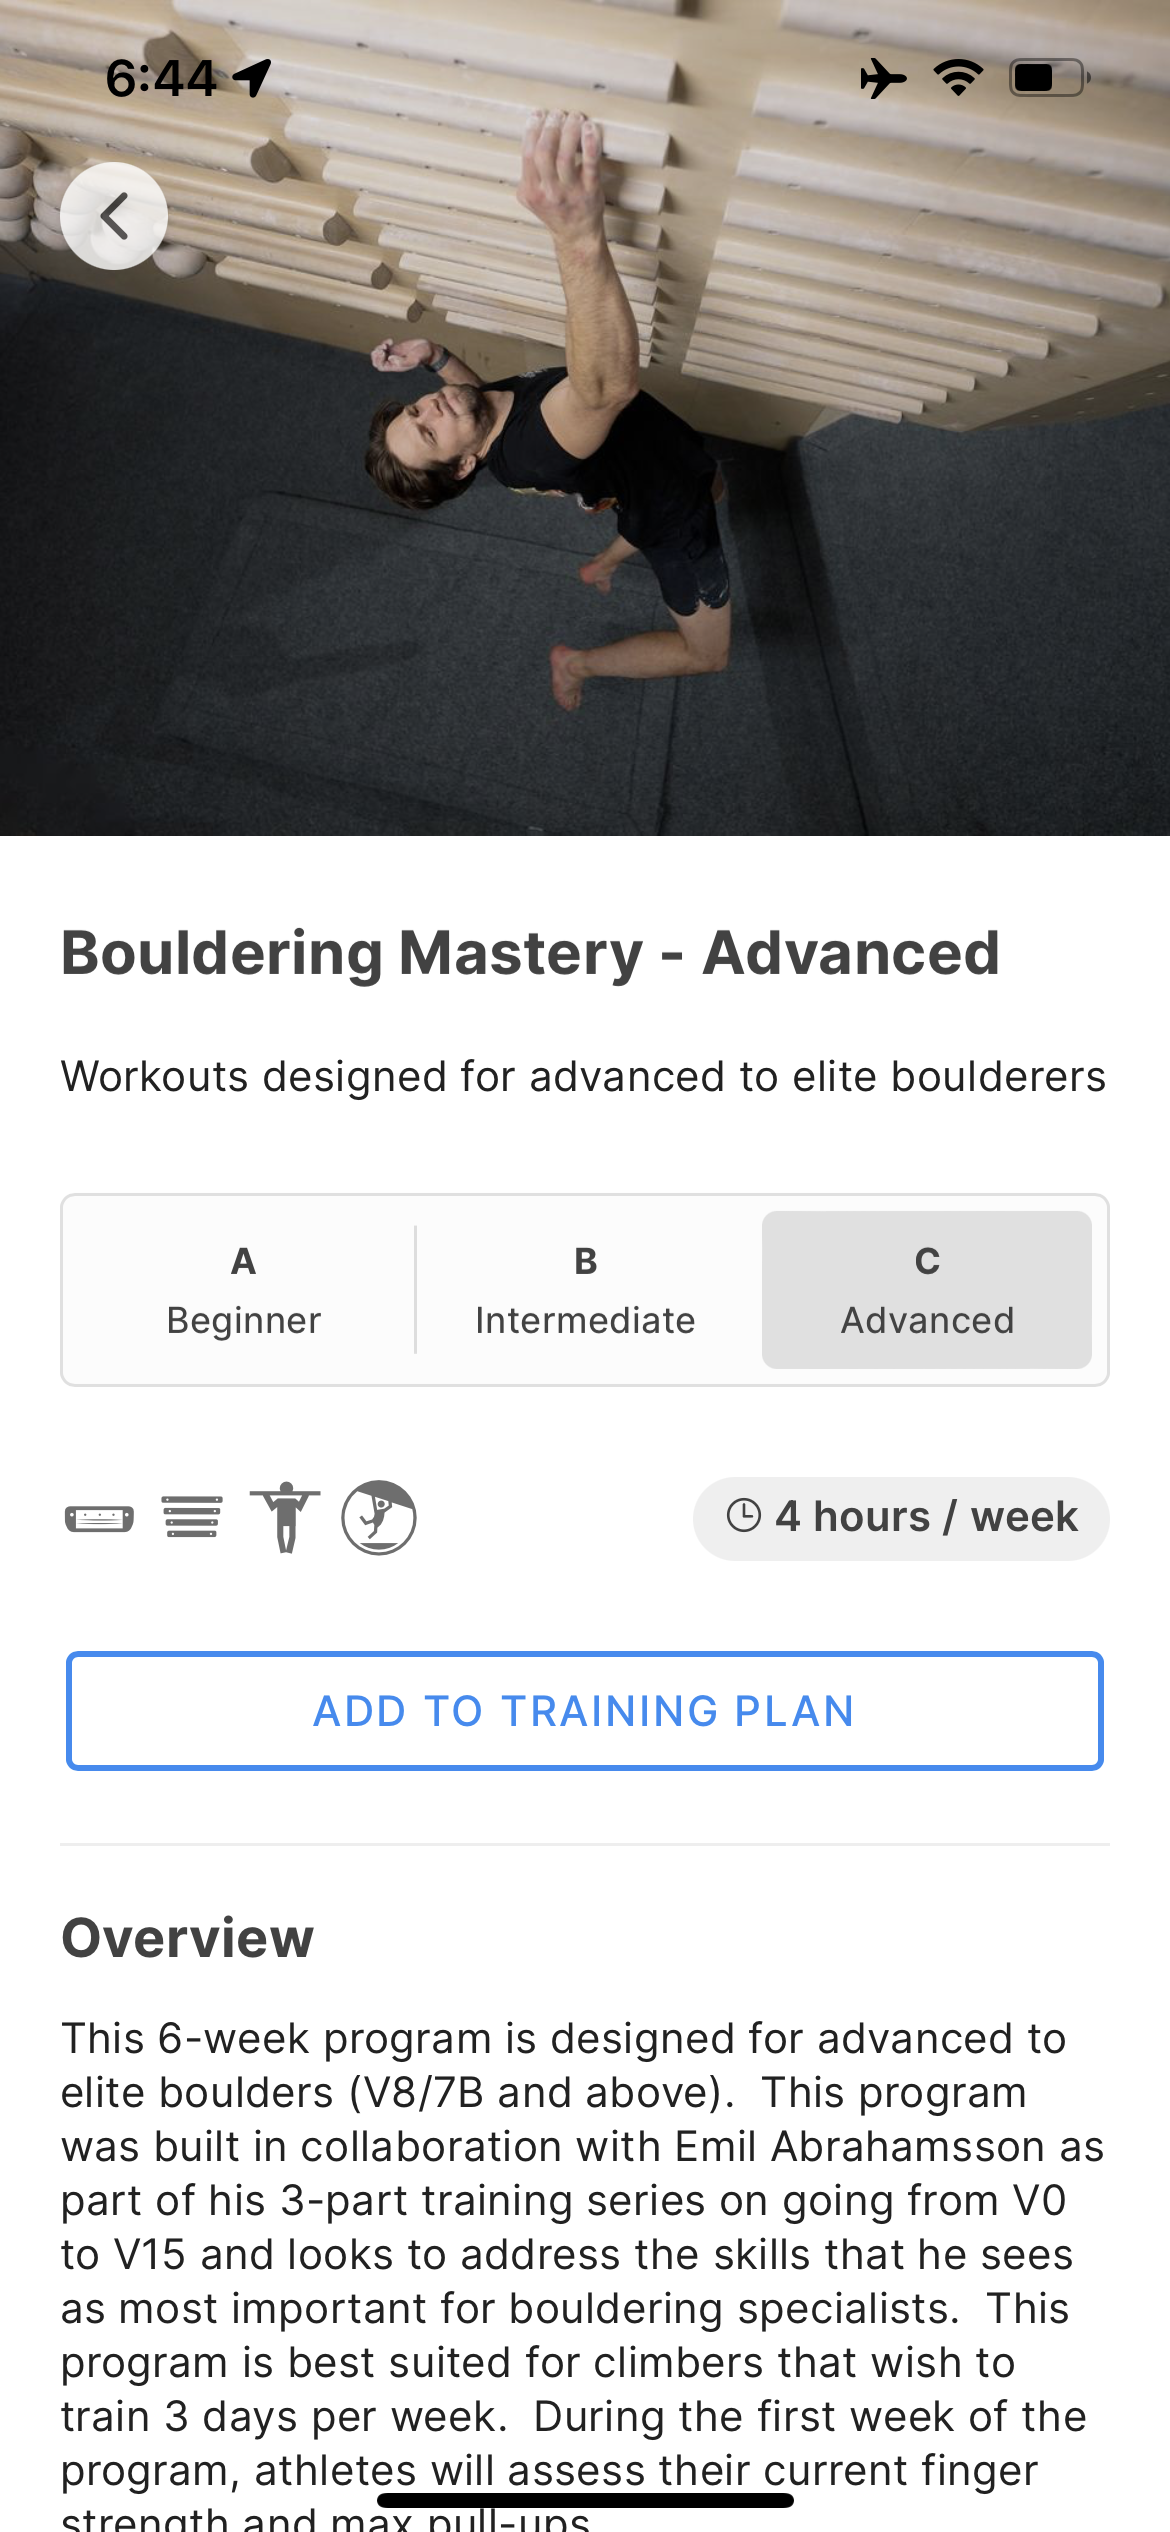
Skill Templates are designed to focus on a specific climbing skill, such as Finger Strength, Core Strength, or Pull-up Strength with progressions designed for Beginner, Intermediate, Advanced, and Elite climbers.
All Skill Templates are 6 weeks in duration and consist of 2x 3-week microcycles (2 weeks of base loading followed by 1 week of rest/deload)
Once you’ve found a Skill Template that is appropriate for your current skill level and goals, select the Add to Training Plan button to add the Skill to your training plan. If this is your first training plan a new plan will automatically be created for you. If you have an existing upcoming training plan, you may alternatively select to add this Skill Template to your upcoming training plan.
Option 2: Start with a blank training plan
You can also create a new blank training plan as a starting point. To create a new blank plan select the Create Training Plan button on the Training Plan tab.
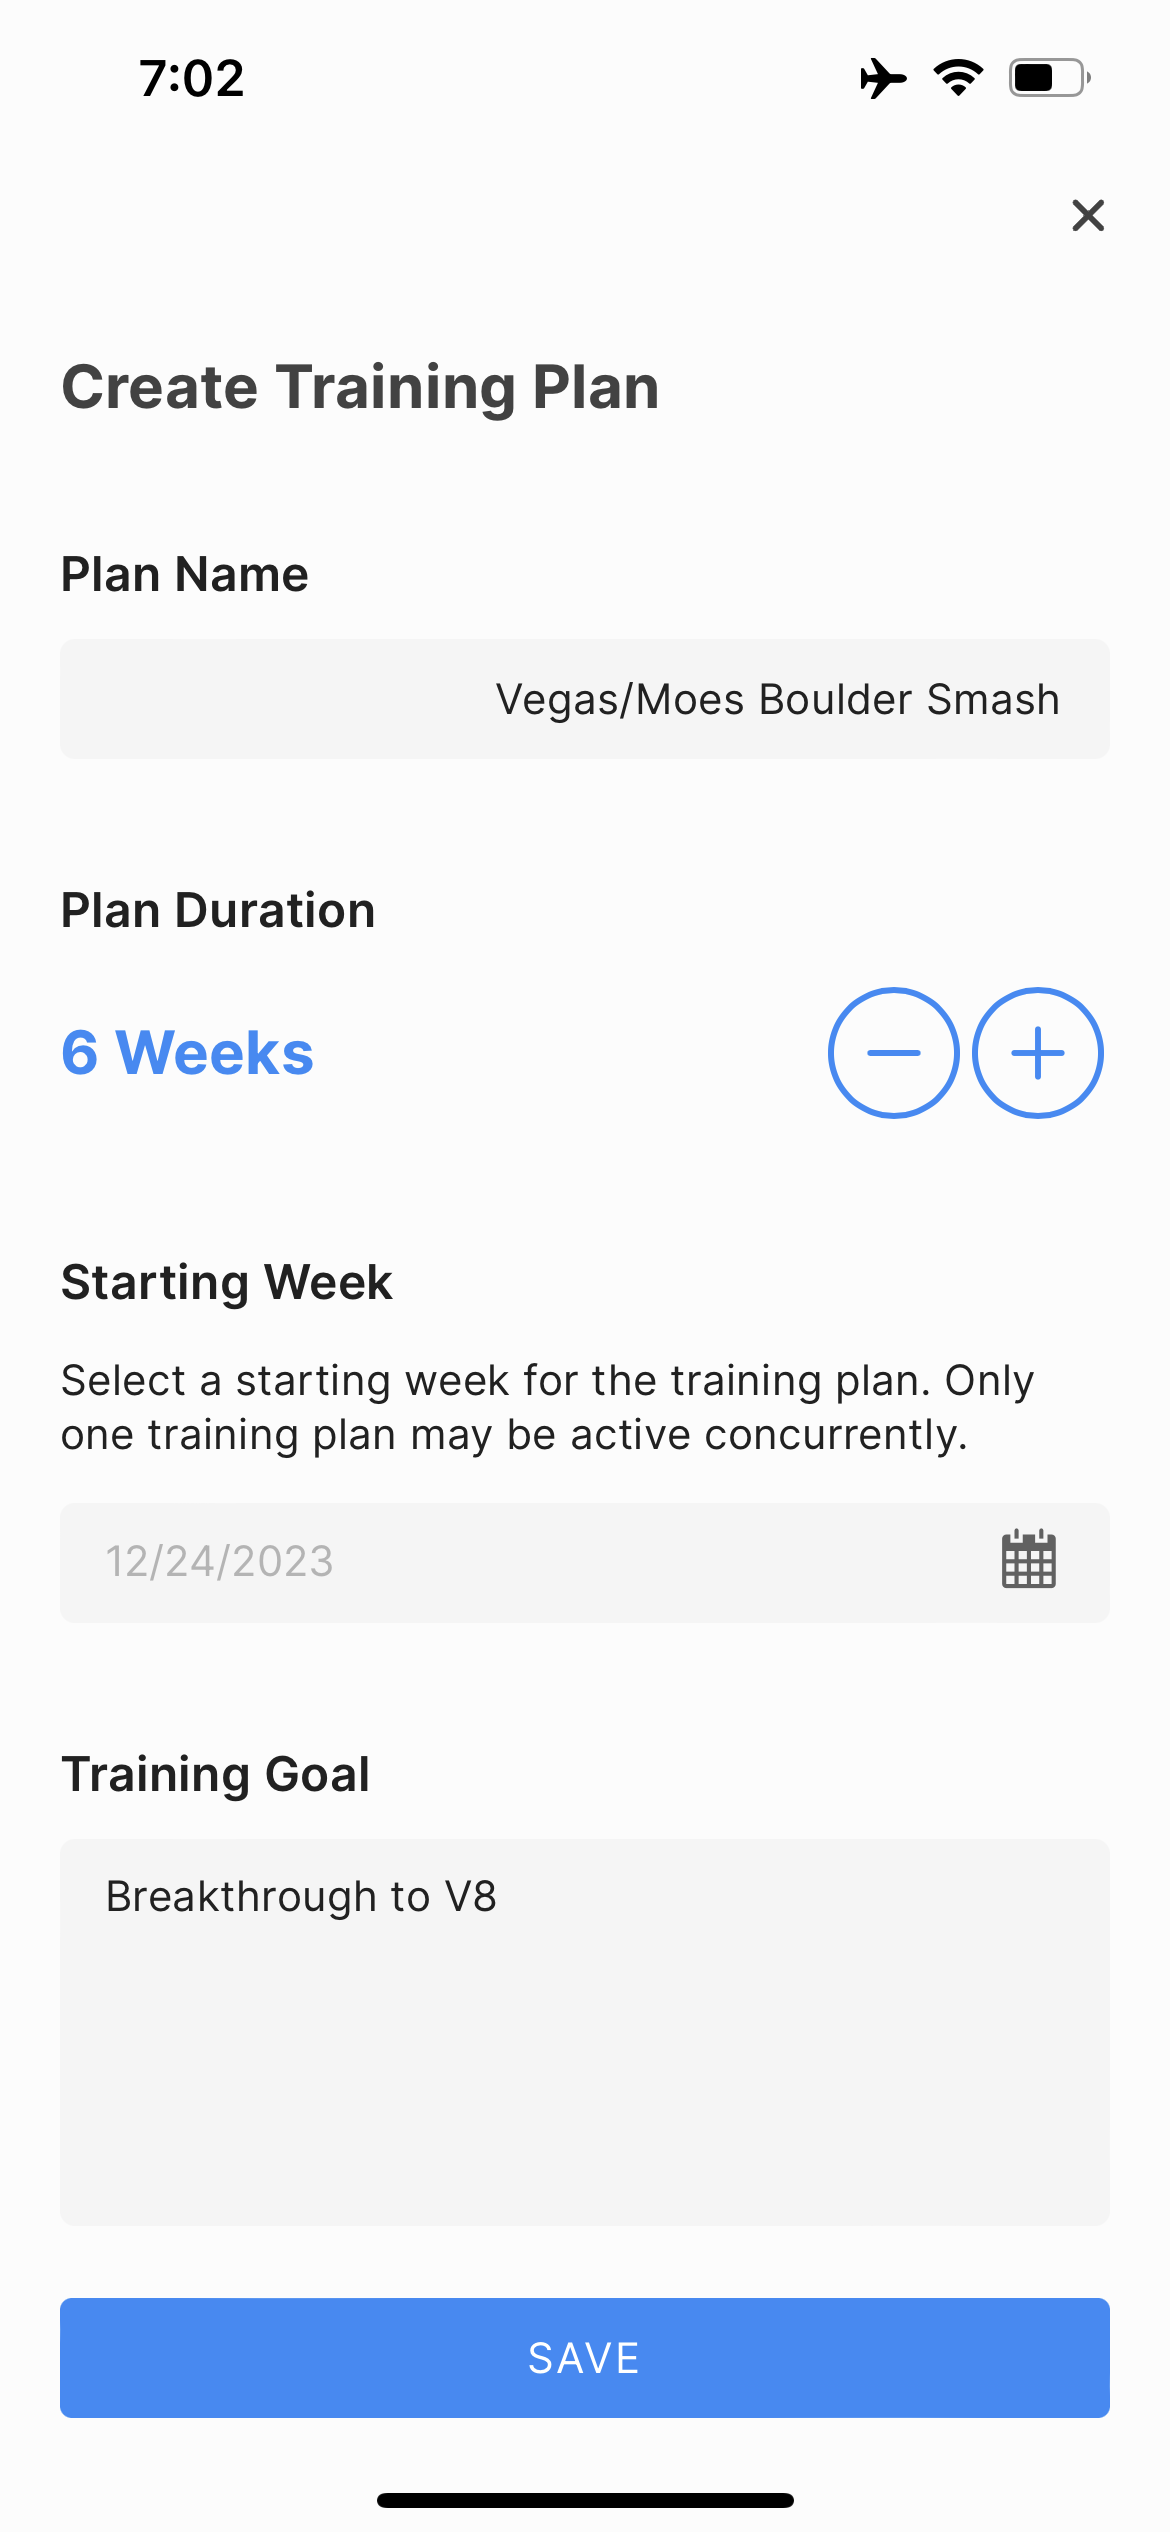
When creating a new training plan a suggested plan name will be generated based on the next available starting date for the training plan. By default, the next available starting date will be selected.
Please note that only one training plan may be active concurrently.
Once you have created your new Training Plan you will be automatically directed to the Training Plan builder page.
TIP Training plans are scheduled to start on the first day of the week. In North American regions of the world, the starting day will be Sunday. In regions of the world that follow ISO date standards, the first day of the week will be Monday (select regions may use Sunday as their starting day). If the default region does not correspond to your preferred locale, you may change the starting day of the week in the Settings menu.
2 Add workouts and skill templates to your plan
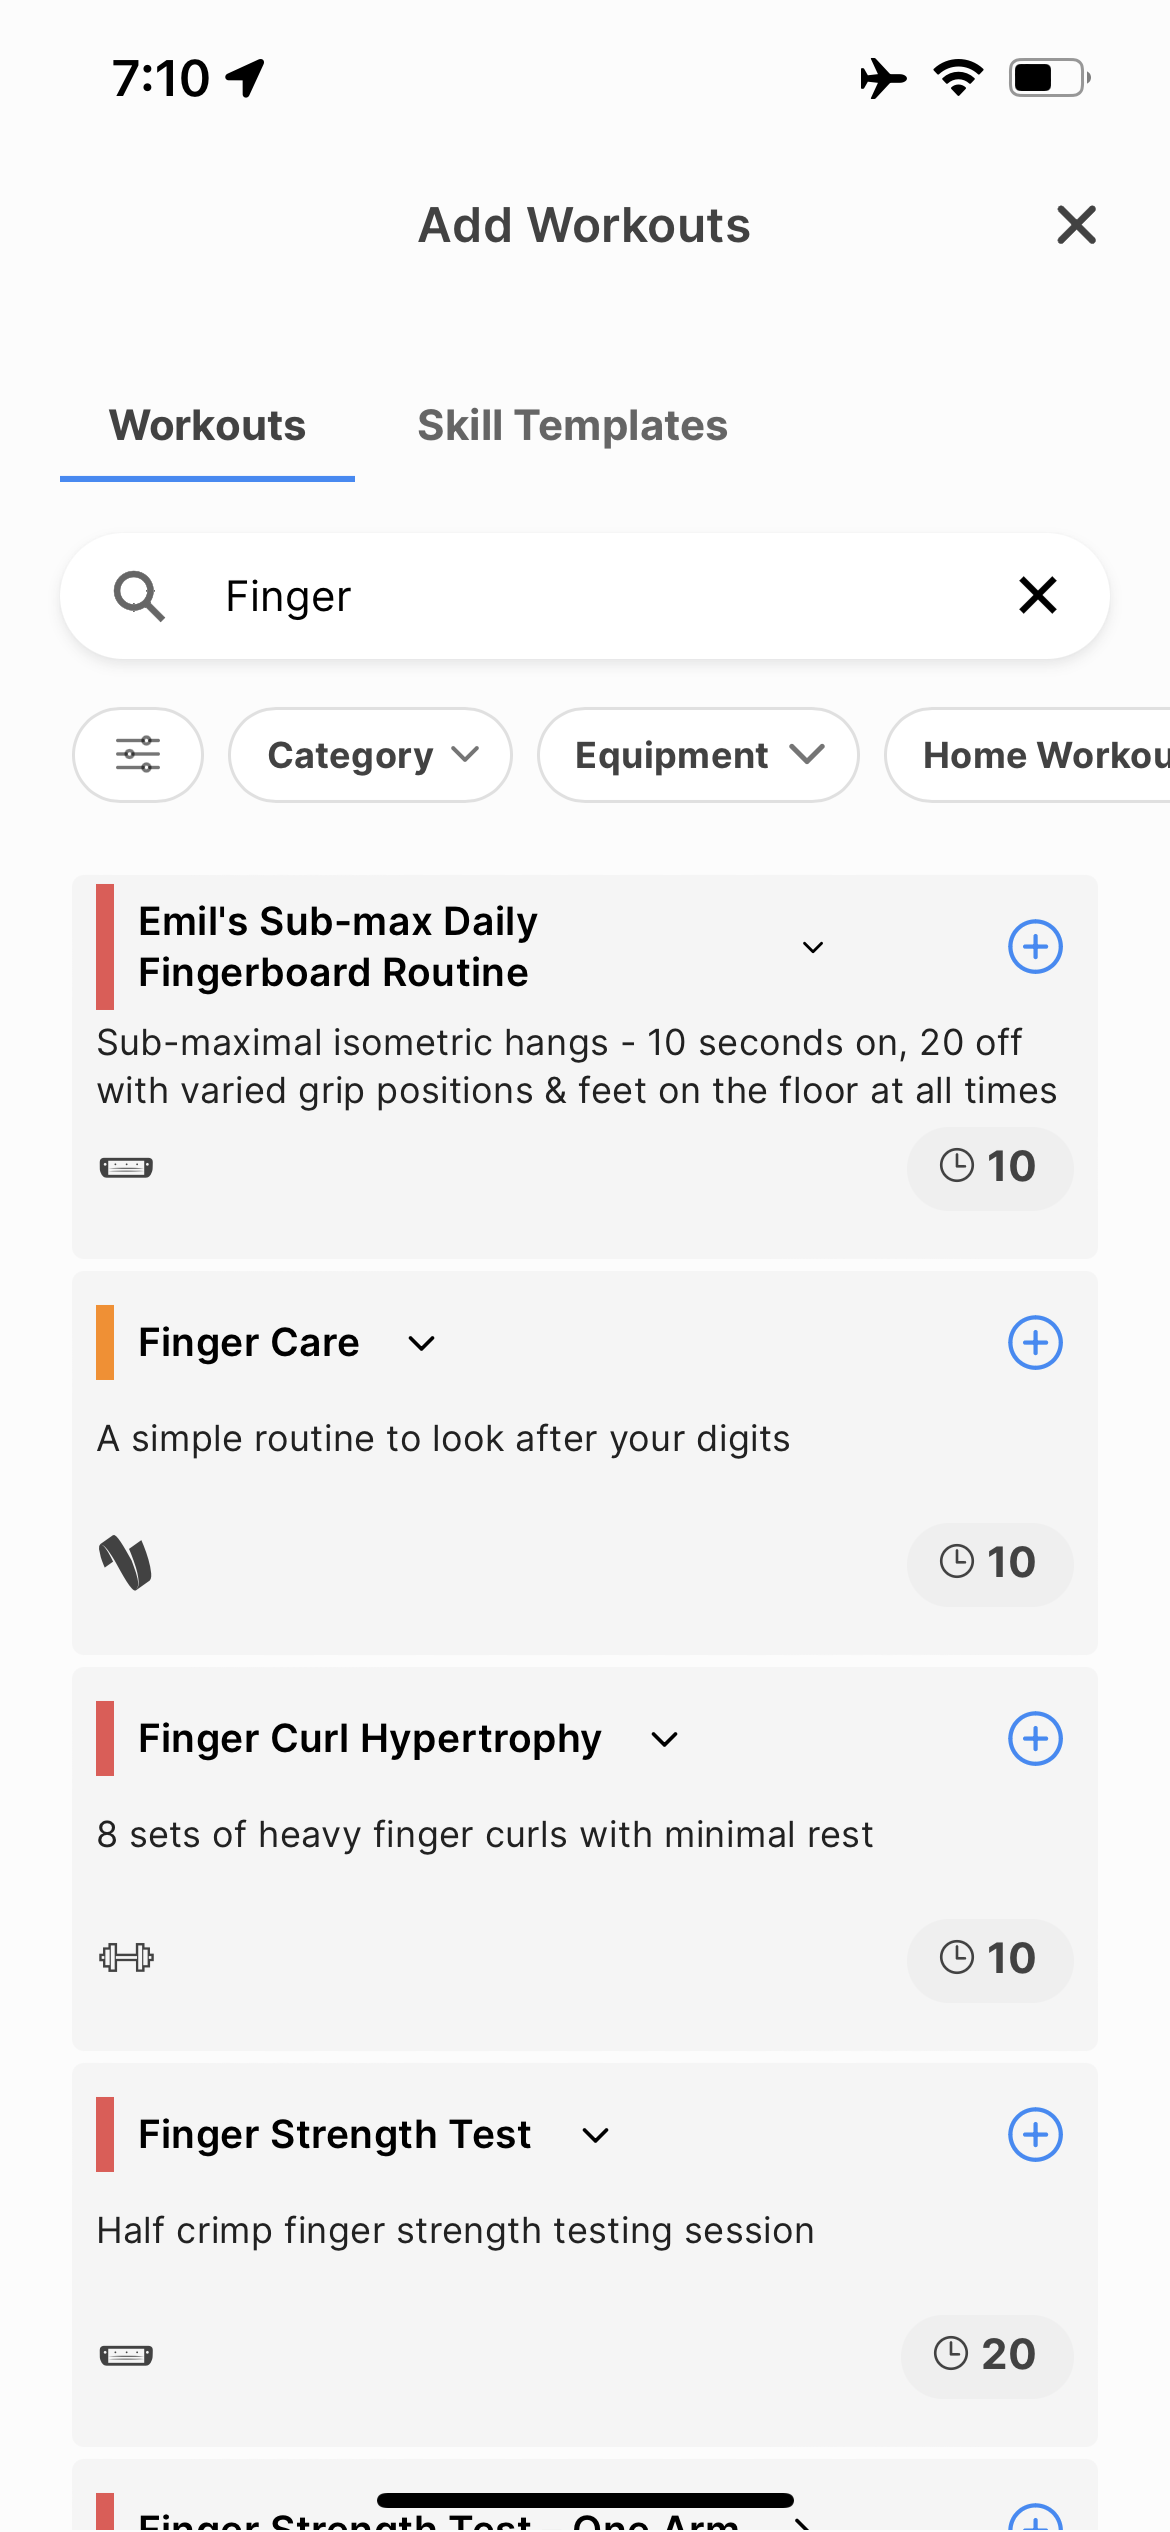
Workouts and Skill Templates can be added to your plan by clicking on either the Add Workout, Add Skill Template, or the blue + button.
From within the Add Workouts view you can easily switch between all available Workouts and Skill Templates. The Search filters allow you to find specific workouts by Category, Equipment, or even those that are suitable for the home.
It is also possible to build your plan by exploring Workouts within the app. On the Workout Details page select the Add to Plan button, followed by Add to Existing Plan and then Add to Training Plan.
3 Schedule workout volume and adjust your weeks
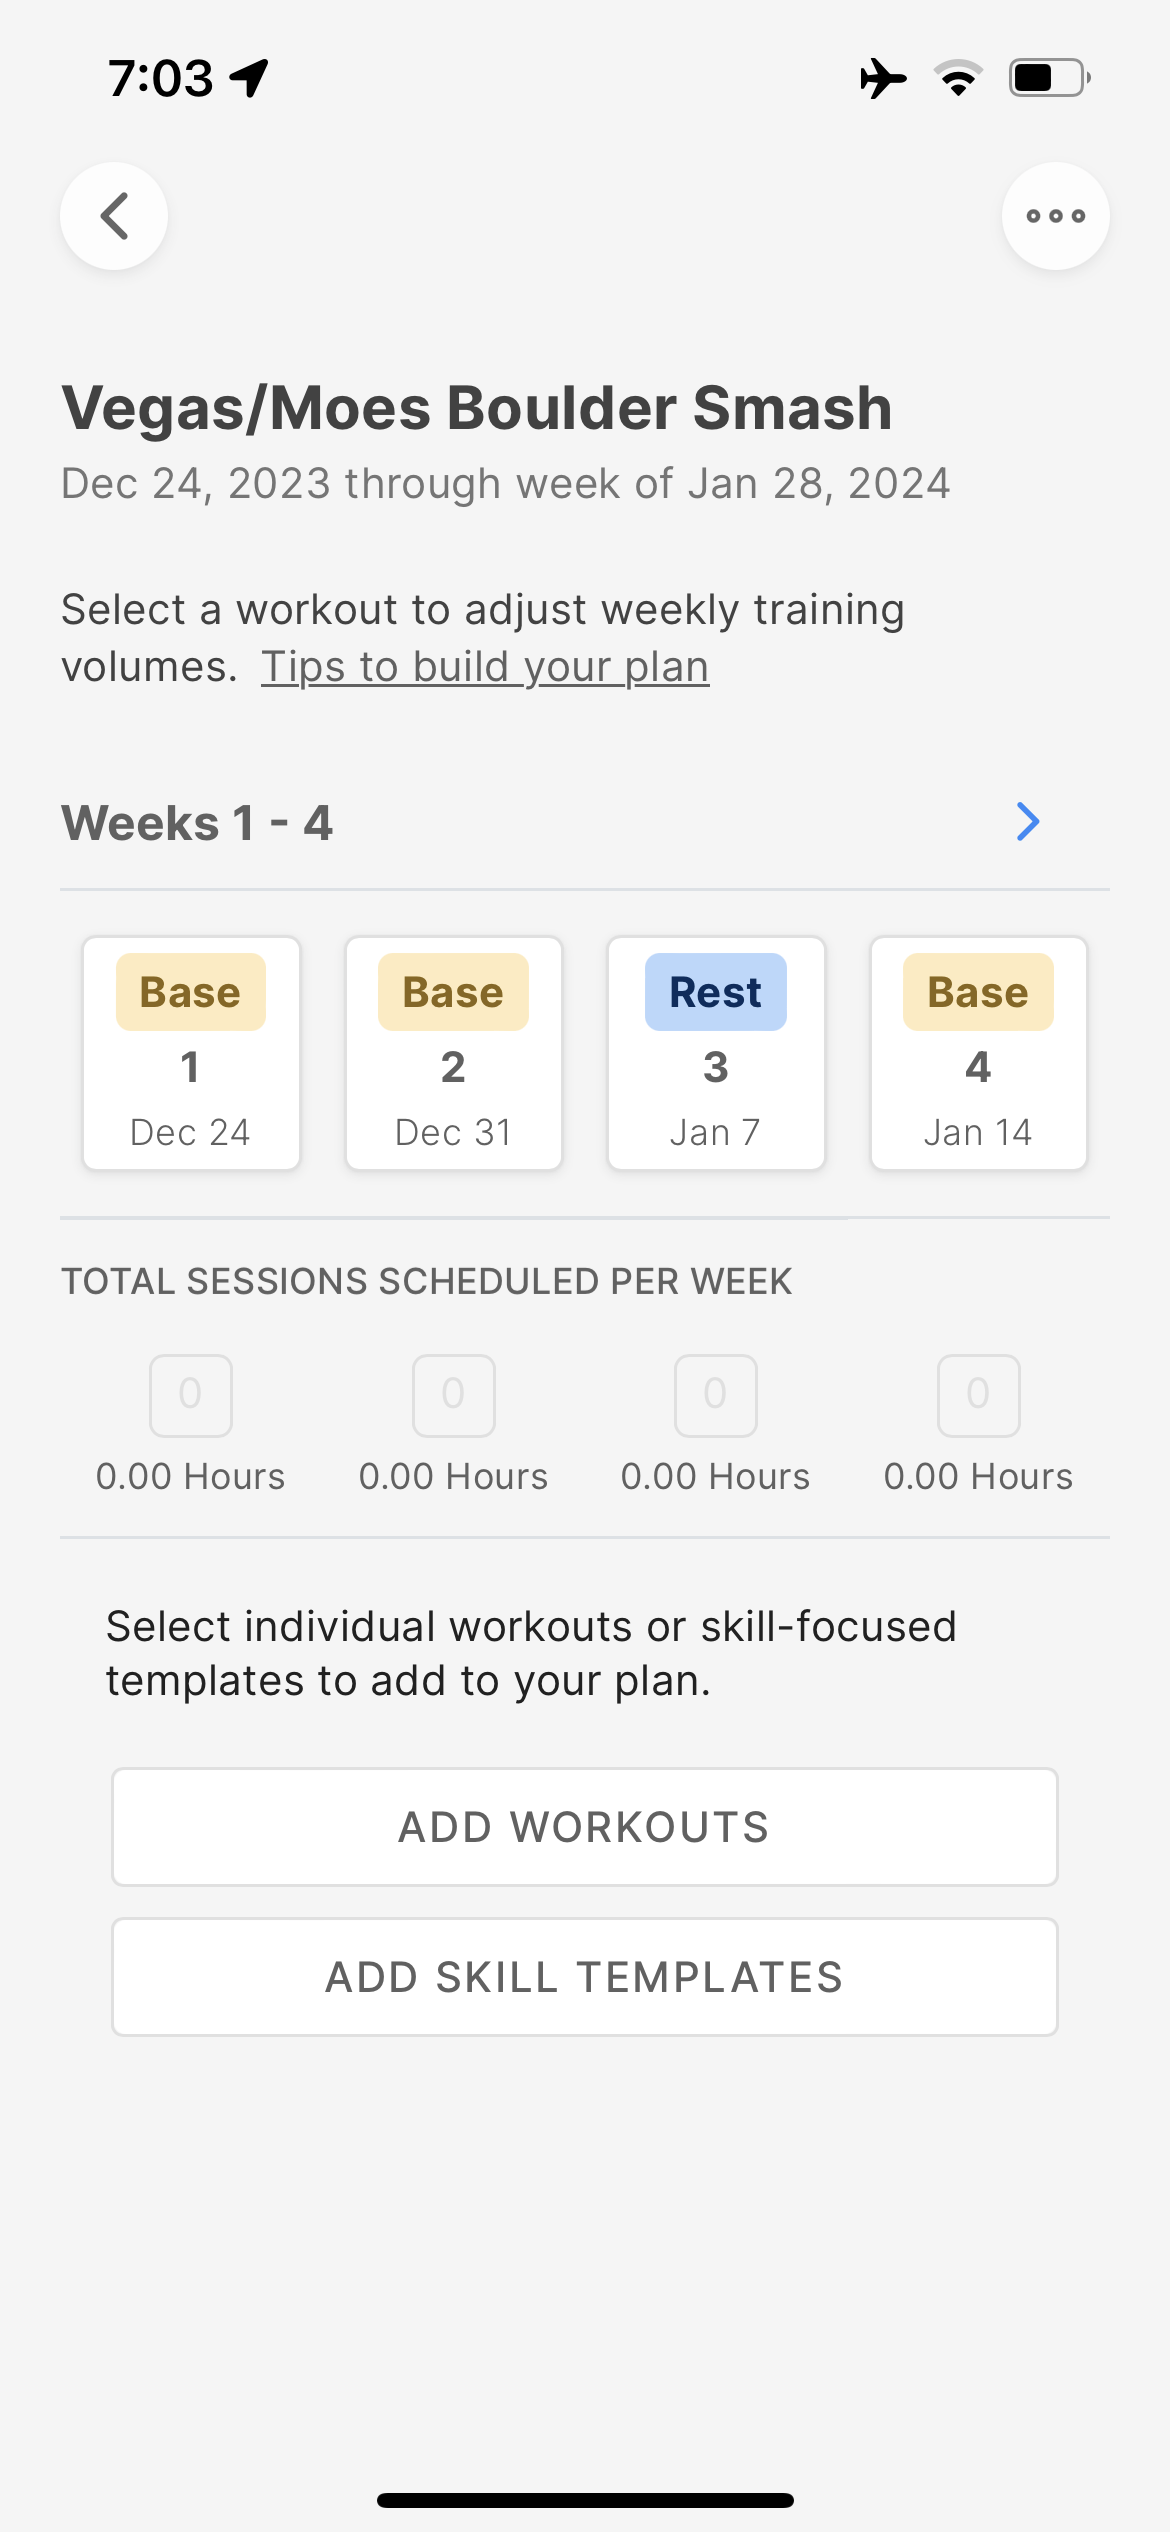
Each week you will be able to view your currently weekly progress by using the 'Week' tab within the Training Plan section of the app. You can view past, current, or future weeks by selecting the left and right arrows of the week title.
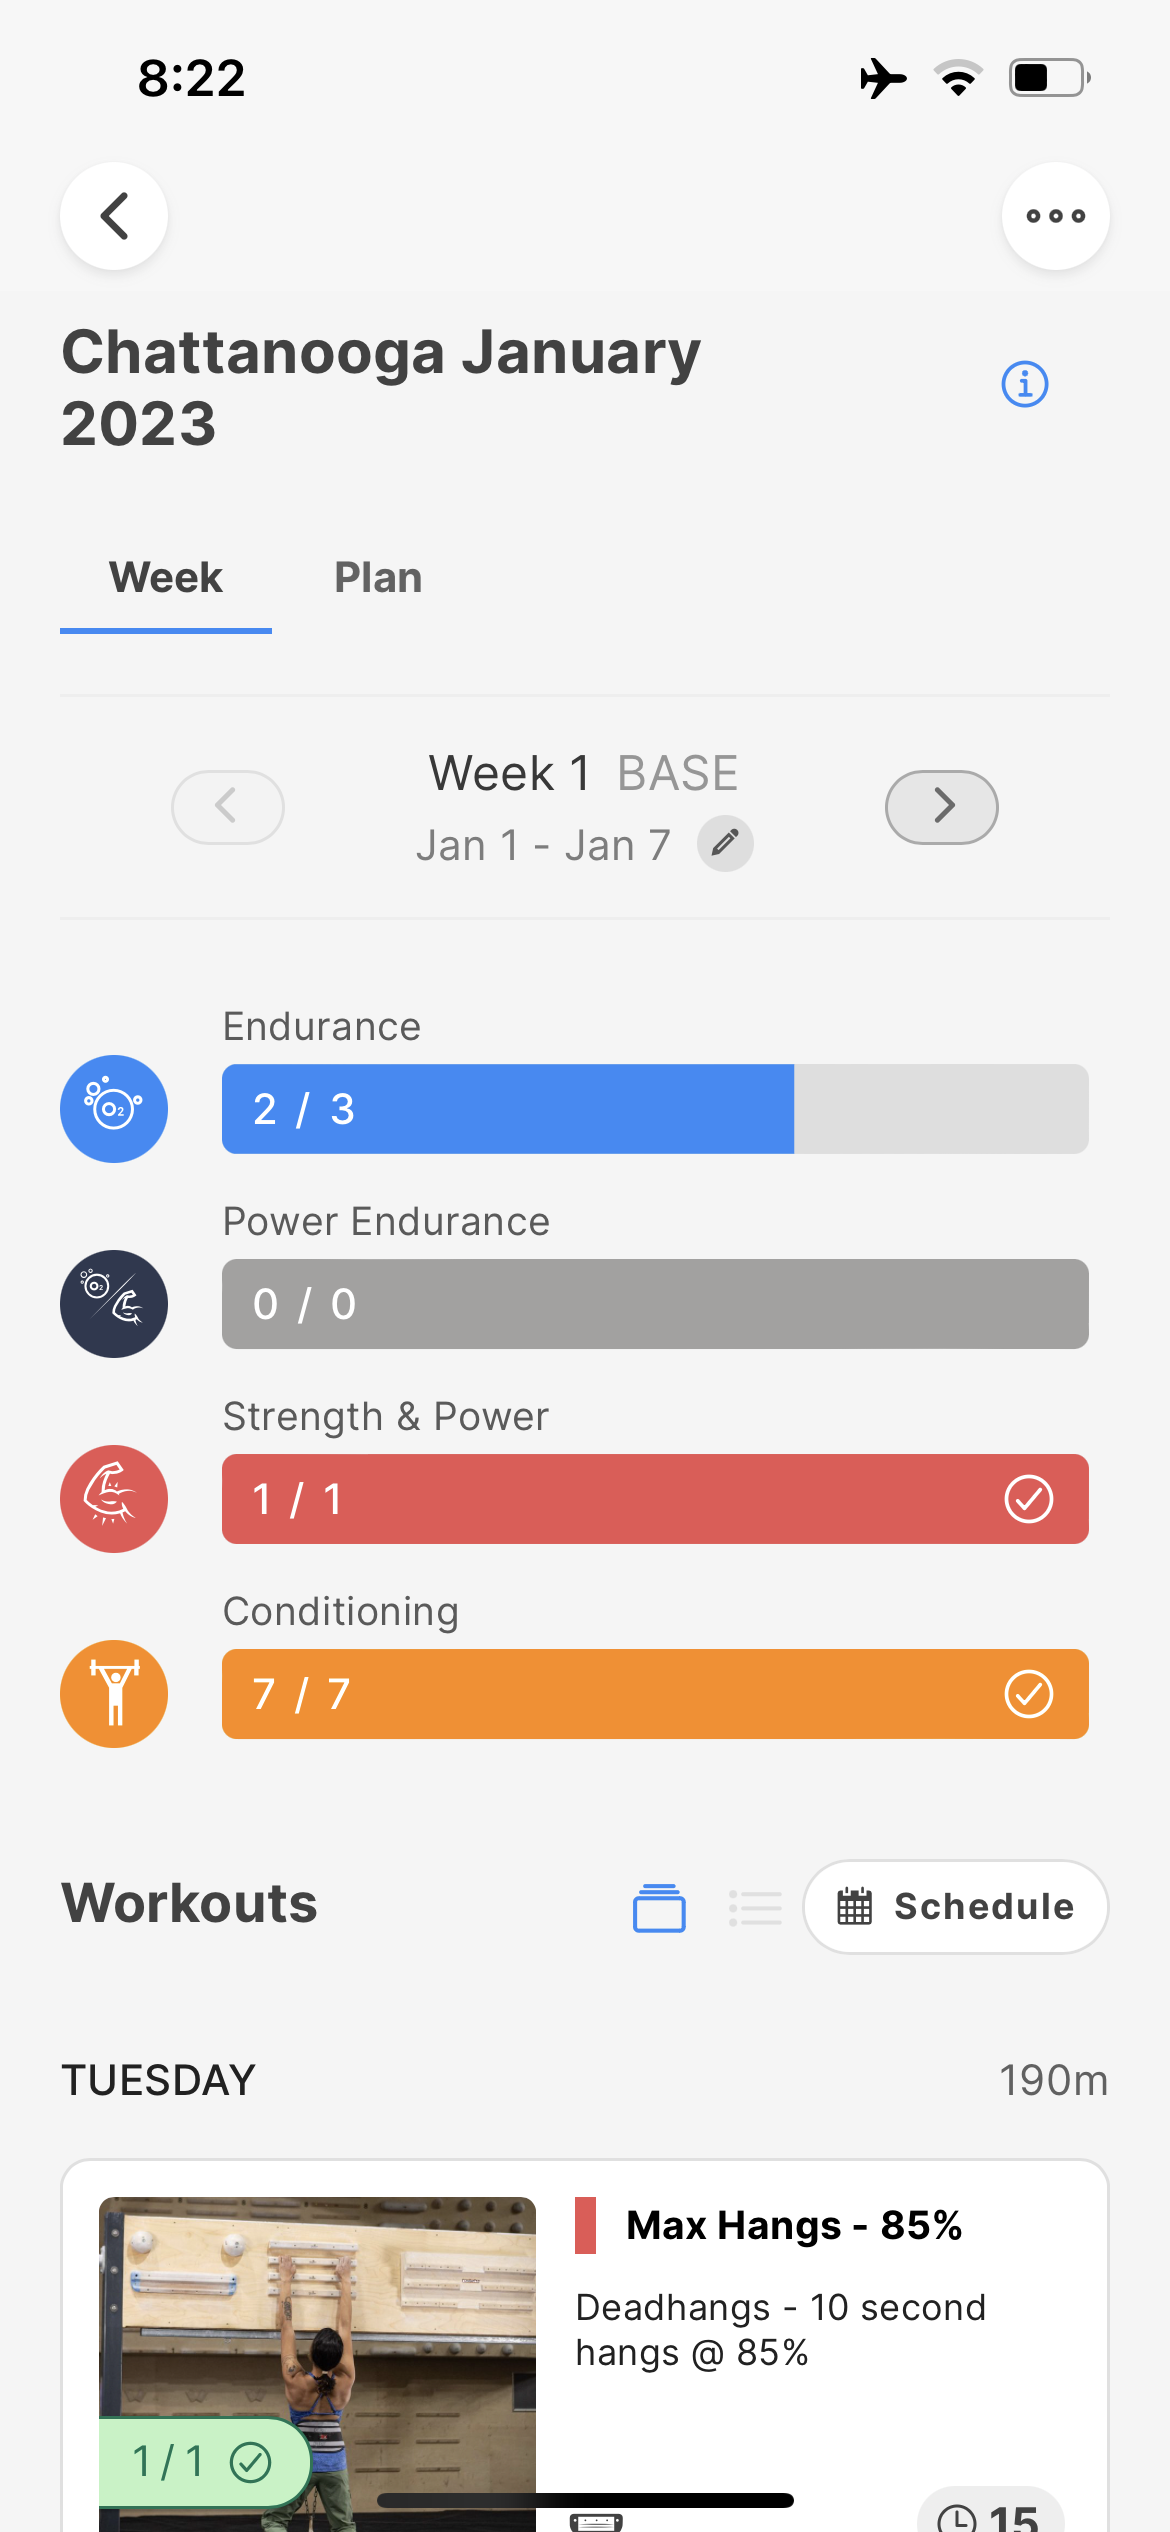
Within each week your progress will be automatically tracked and when a week has been completed for a given category a check-mark will appear.
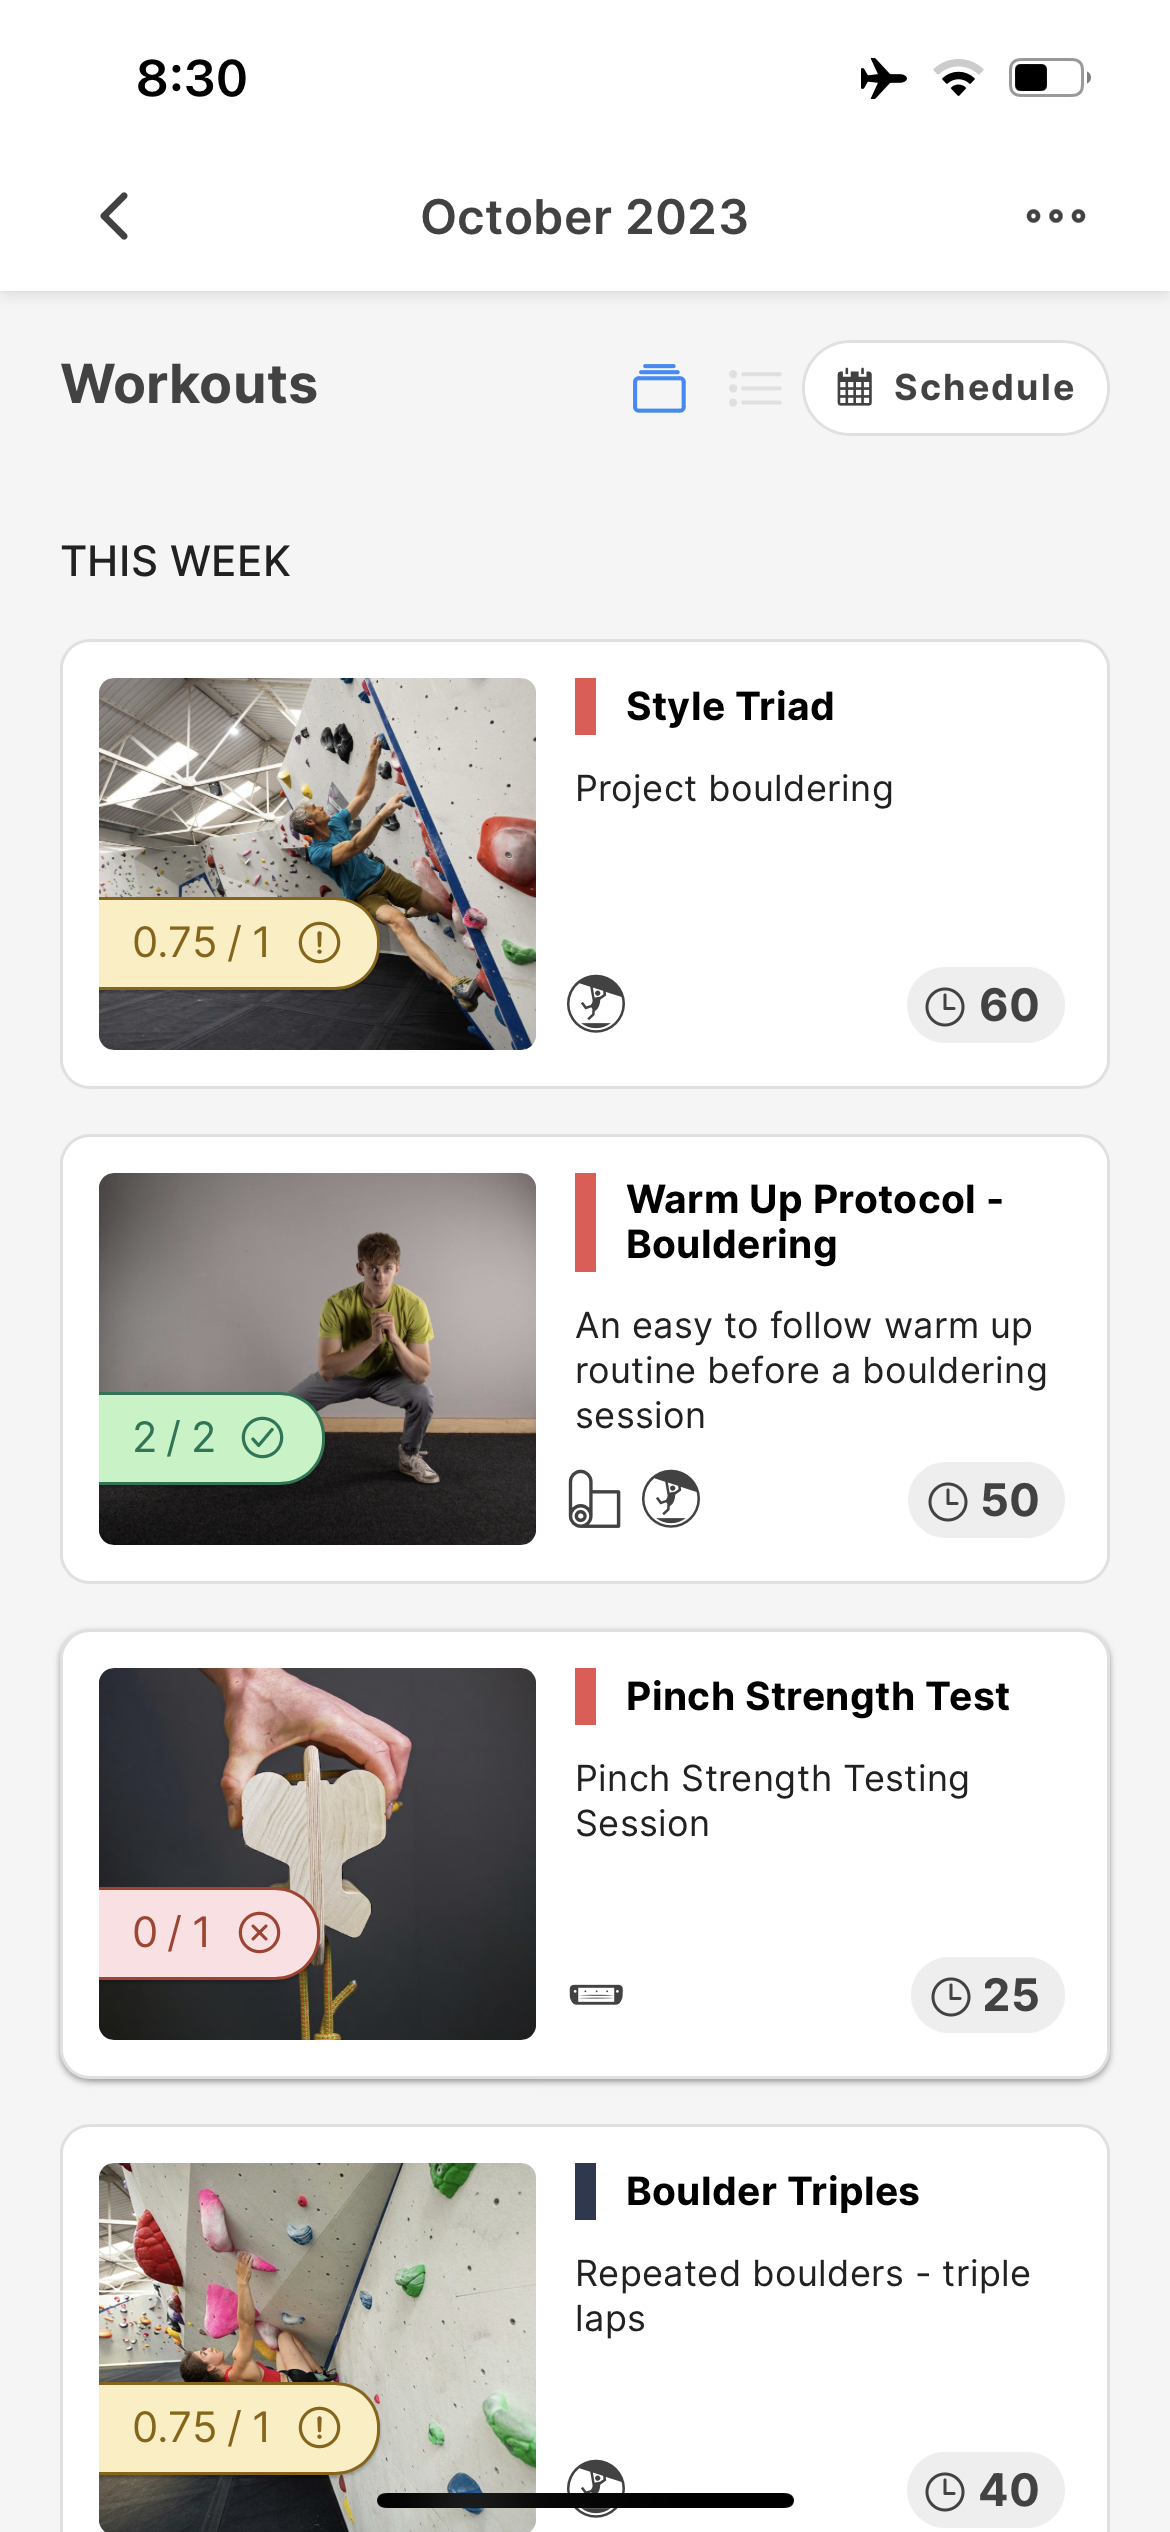
Each week your scheduled workouts will indicate your progress. Green indicates that a workout has been completed, Yellow is partially completed, and Red indicates the workout was skipped.
Schedule total weekly volume for each workout
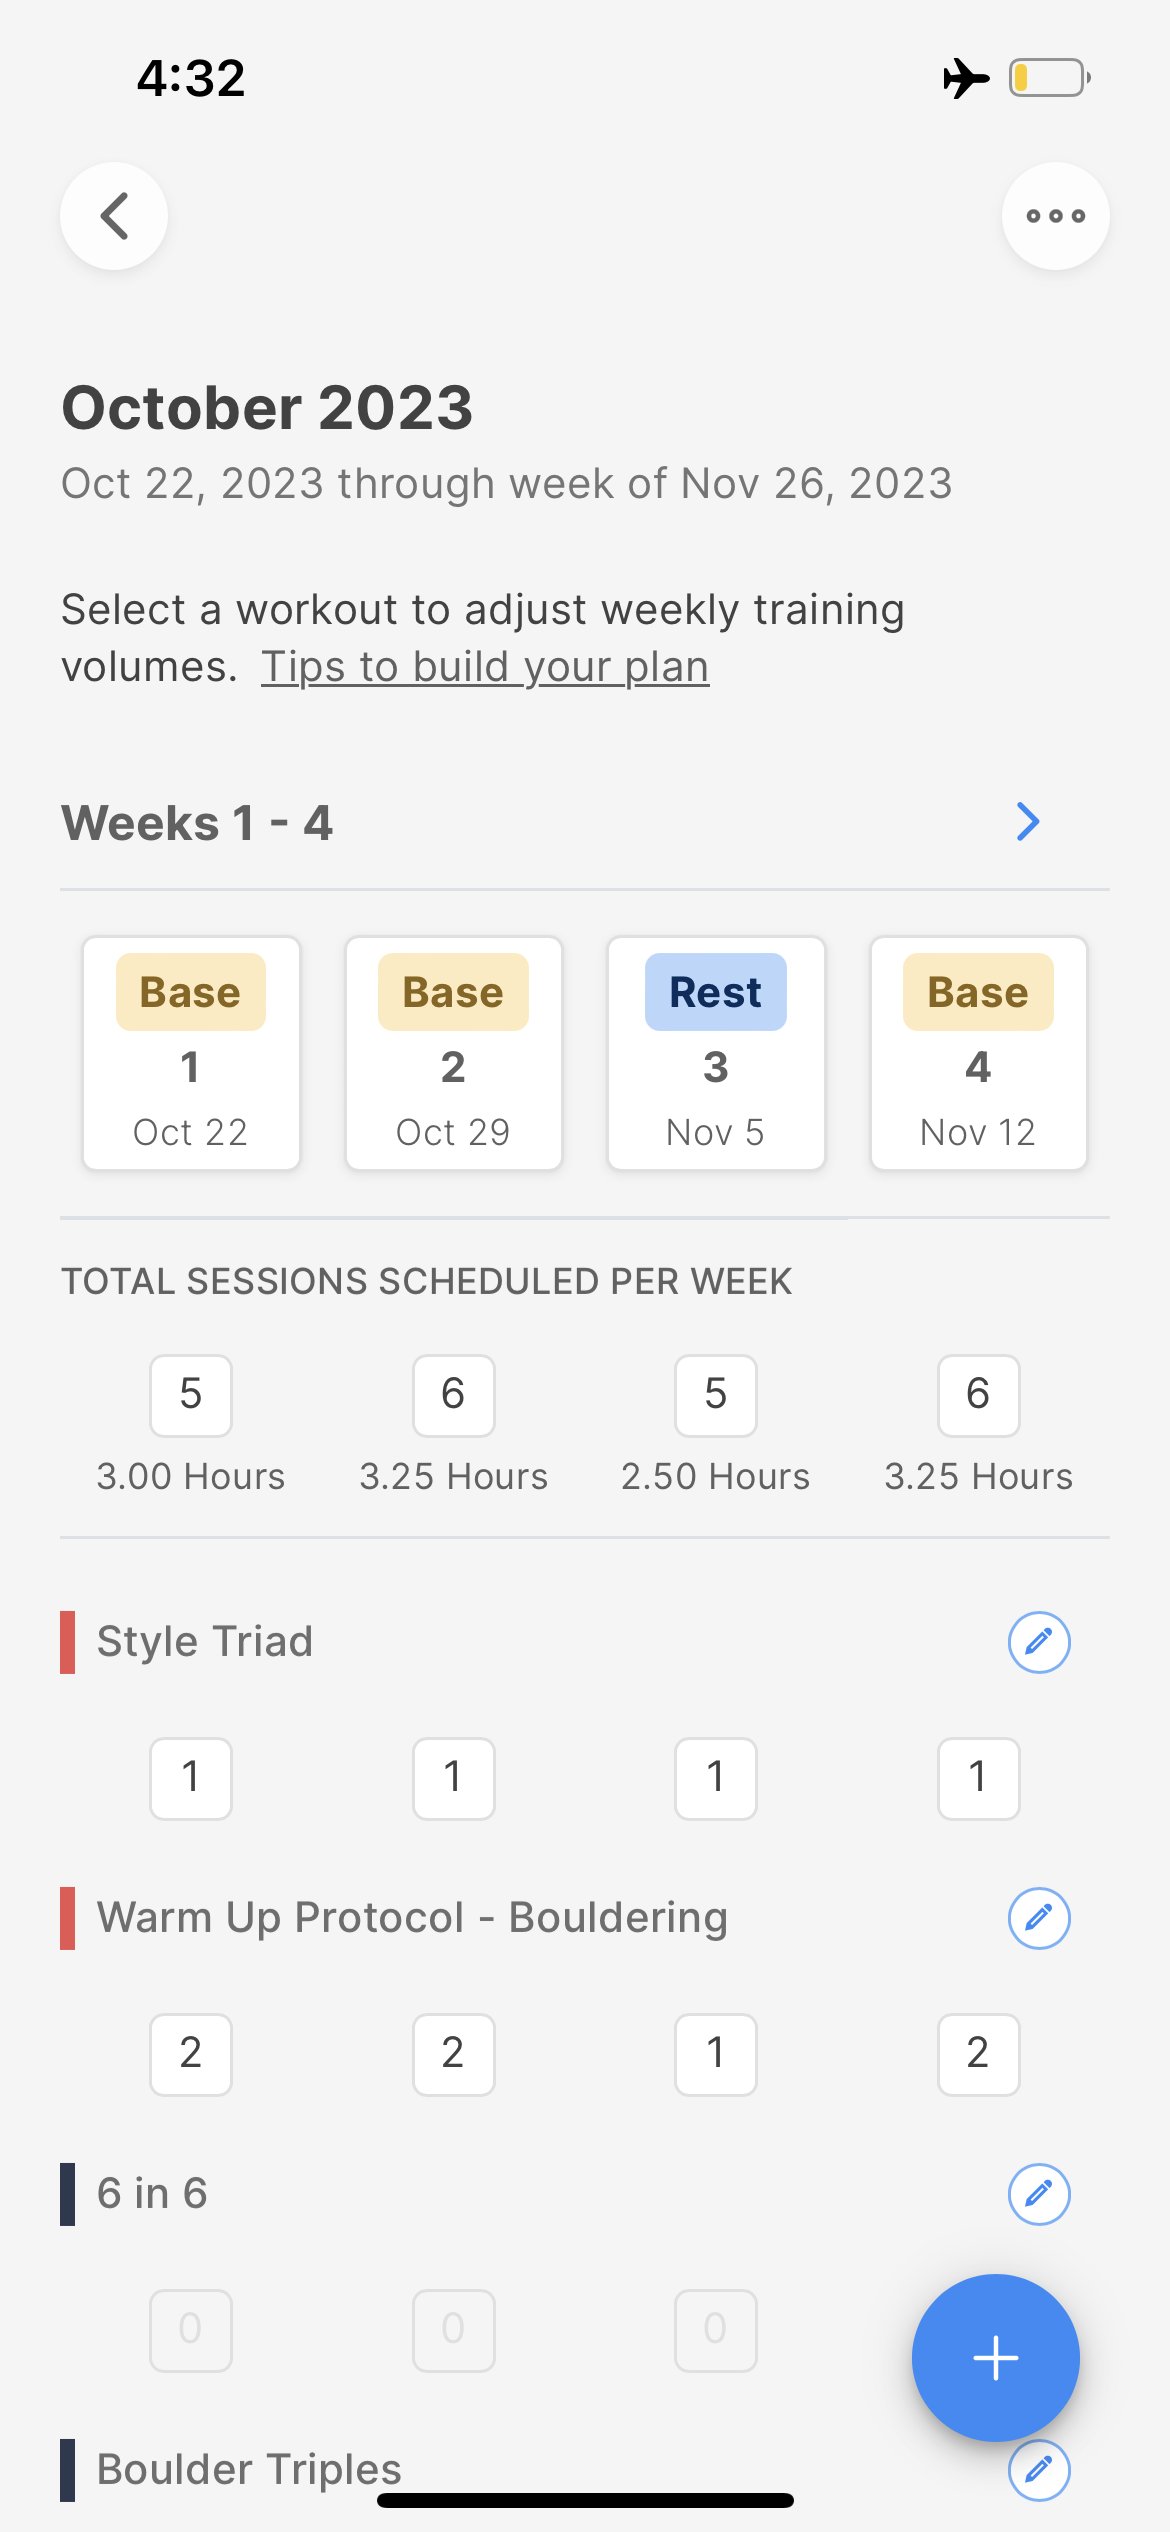
Once you have added workouts to your plan, you may begin scheduling the weekly volume for each workout by selecting the “Edit” icon next to the workout name.
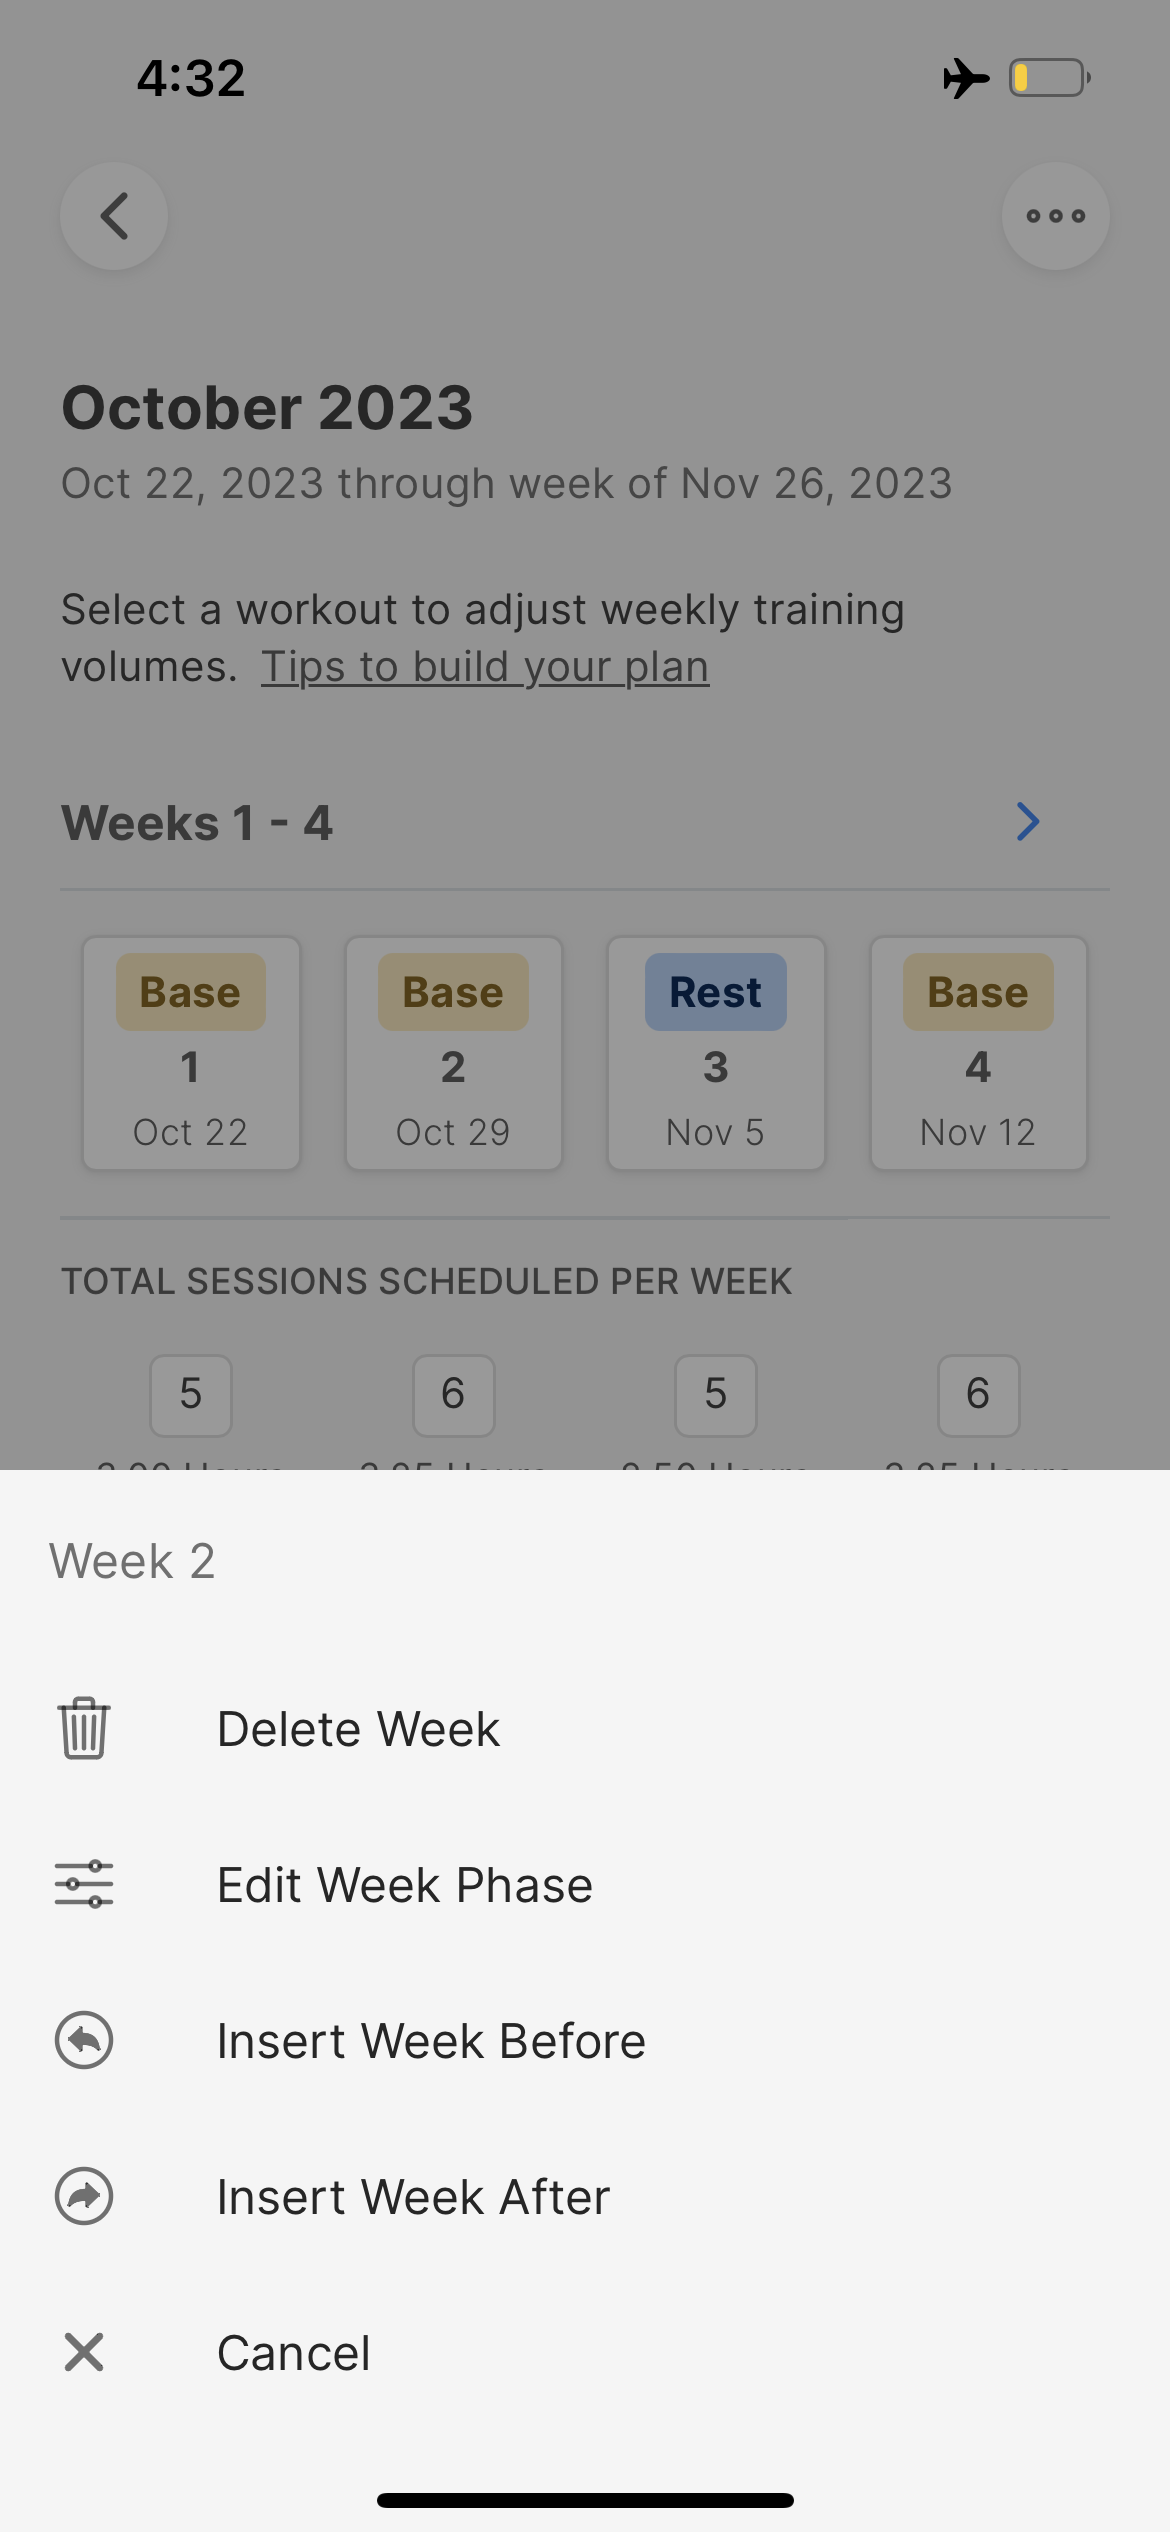
Adjusting weeks
You may adjust the weeks of your training plan by selecting the desired week number at the top of the plan builder page. With each week you will have the option to:
- Delete the week from the plan
- Add or remove a week before or after the selected week
- Edit the phase of each week
Training plan phases are broken down into 3 different categories:
Base - Weeks that are suitable for standard training load
Rest - Weeks that are intended to serve as a rest or deload week (typically about half the total volume as a Base week)
Peak - Weeks where supplemental training is kept to a minimum in order to prioritize Peak performance on climbing projects, trips, or competitions.
When selecting an appropriate micro-cycle for your training plan it is important to balance the ratio of Base-to-Rest weeks. By default, all custom training plans will have a 3:1 Base to Rest micro-cycle. Skill Templates are designed to be more conservative and therefore utilize a 2:1 Base to Rest micro-cycle.
Adjusting the plan start date
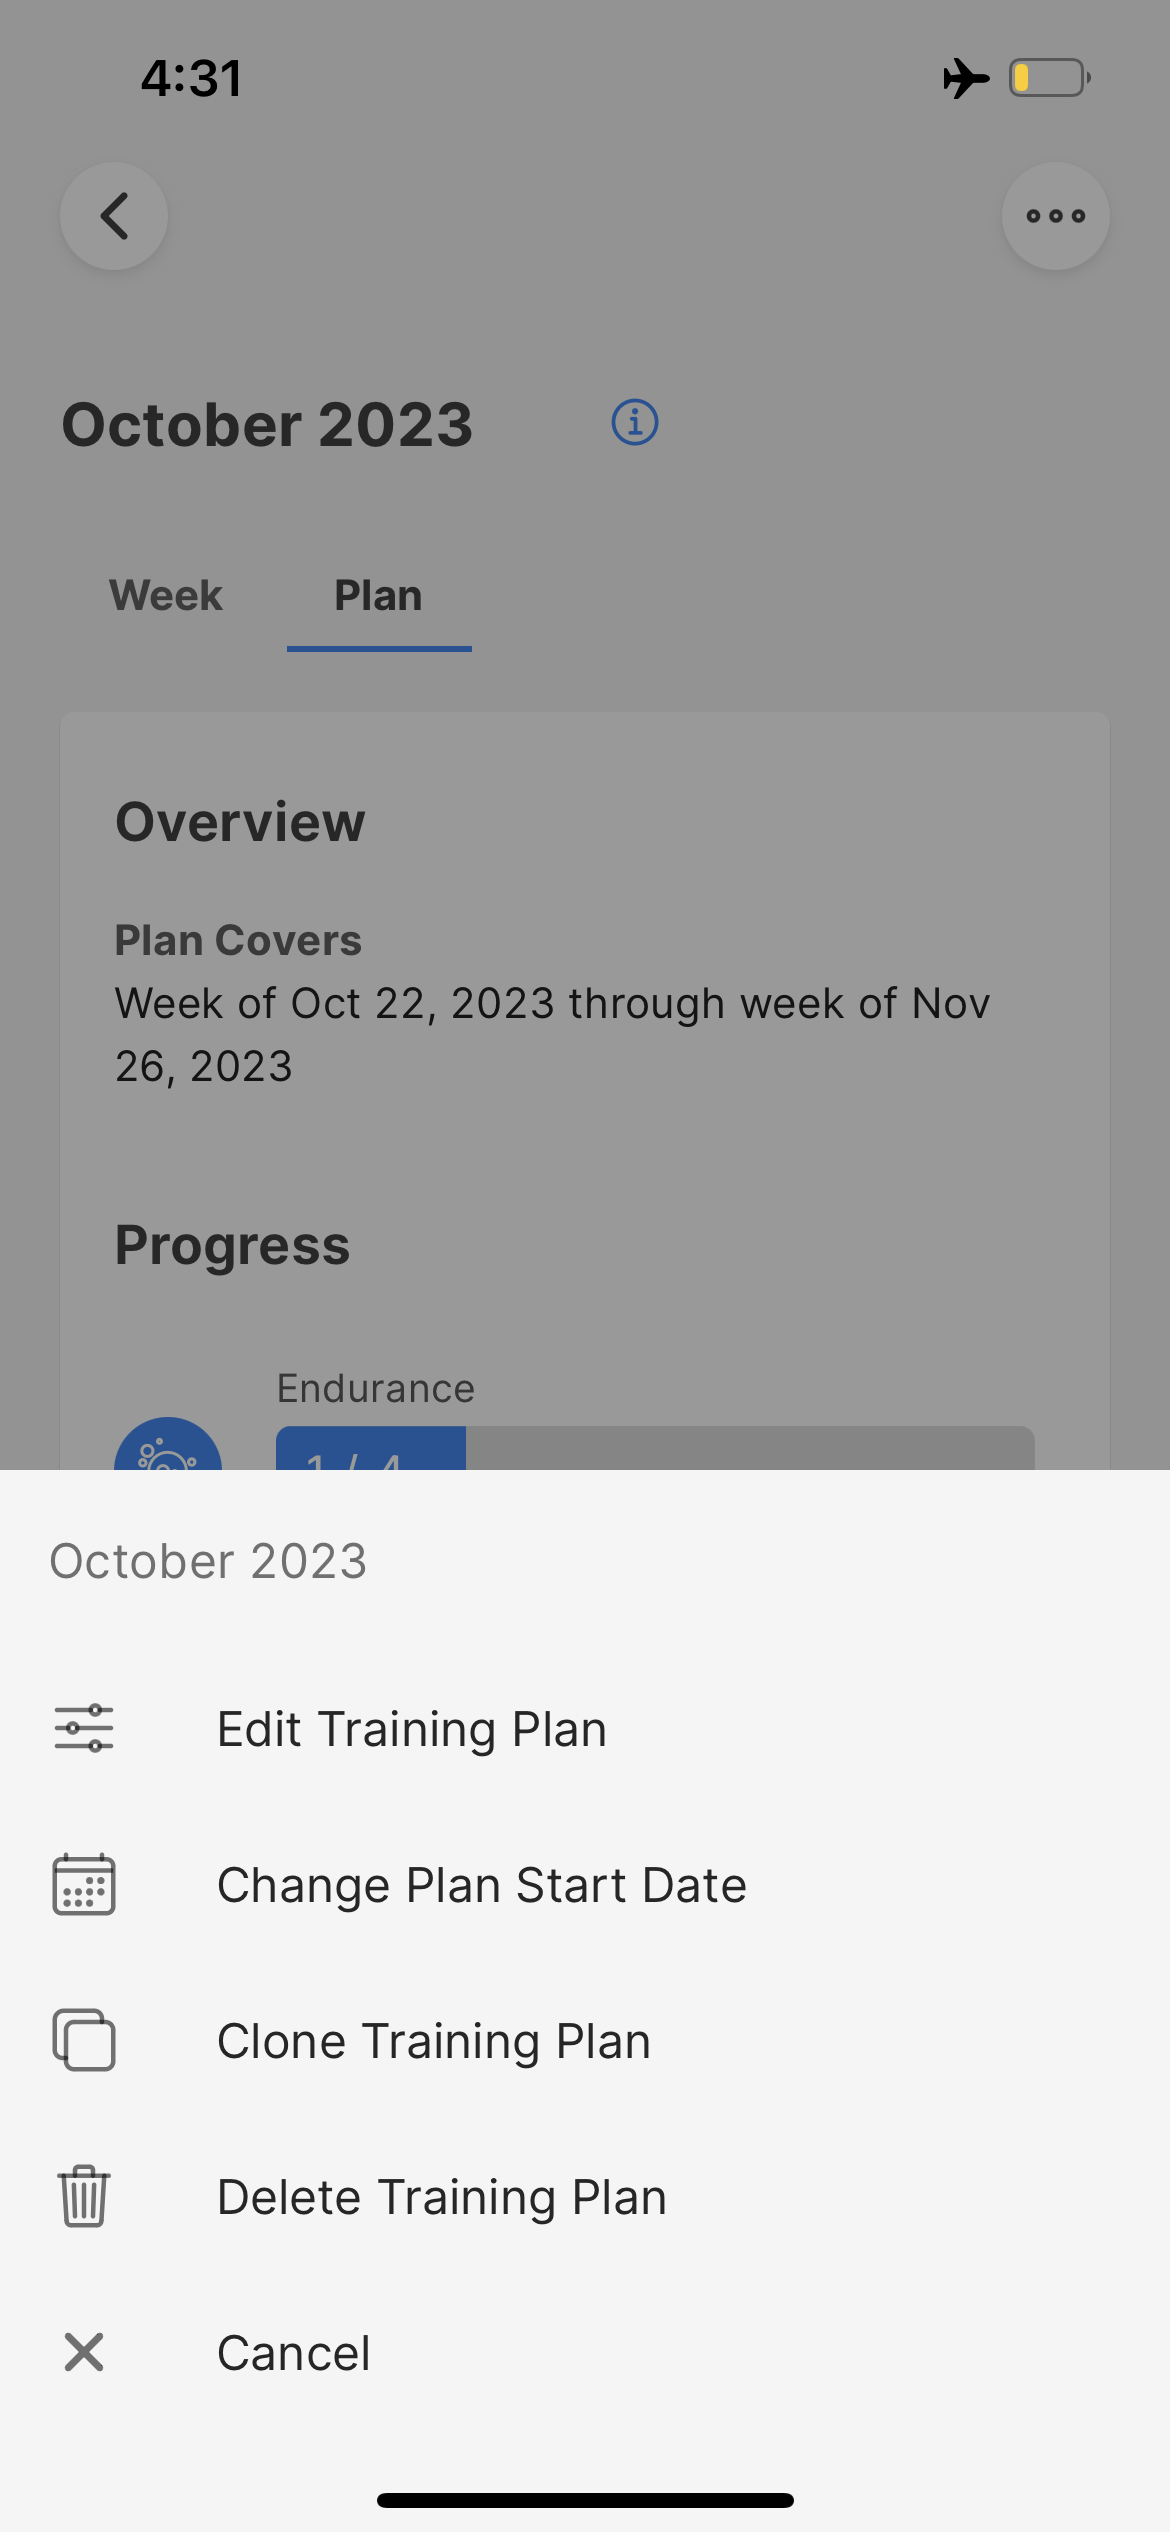
If you would like to change the name of your training plan, edit the plan duration, change the starting week, or delete the training plan simply select the ... button at the top of the page.
Training Plans may have a minimum duration of 1 week and a maximum duration of 24 weeks. We recommend that you limit the plan duration to a maximum of 12 weeks. Longer training plans and cycles can easily be split up into multiple plans, which allows for easier management.
4 Structuring your weeks
It is important to schedule the correct workout in the correct order during a given week. As a general rule of thumb, Endurance workouts are the least intense, followed by Power Endurance, and Strength & Power.
| Energy System | Definition |
|---|---|
| Endurance: Regeneration | Low intensity and used to assist physical recovery from more intense training. Improves localised blood flow using easier climbing. This training should be performed on rest days or after harder workouts. Fatigue levels and intensity during training should remain low. |
| Endurance: Aerobic Capacity | Mixed intensity or interval training to force quick recovery, low to moderate forearm pump. |
| Power Endurance: Aerobic Power | Mid/high intensity, high levels of forearm pump and hard to recover from. |
| Power Endurance: Anaerobic Capacity | High intensity, feelings of being powered out and hard to recover from. |
| Strength & Power: Bouldering | High/max intensity climbing aiming to develop specific strength and power. |
| Strength & Power: Power | Max intensity, campus workouts to develop upper body power and finger strength. |
| Strength & Power: Finger Strength | High/max intensity, specific exercises to increase finger strength. |
As a general recommendation, we suggest the following guidelines when planning your week
- The lowest intensity workouts can be performed when fatigued
- Higher intensity workouts should always be done first
- Intense fingerboard workouts must always be done when fresh!
General conditioning is ideally done at the end of the session with a focus on good form, or on rest days. However, priority is usually placed on the climbing specific workouts.
An Example Training Week
Suppose you have a week scheduled with a total of 17 workouts containing the following energy systems:
- 1 x Regeneration
- 4 x Aerobic Capacity
- 2 x Strength & Power
- 10 x Conditioning
| Day | Schedule |
|---|---|
| Monday | Aerocap x 1 |
| Tuesday | Conditioning x 2 |
| Wednesday | Rest |
| Thursday | Aerocap x 1 |
| Friday | Rest |
| Saturday | Conditioning x 2 |
| Sunday | Rest |
Alternatively, if a climber was looking to maximize their training while also providing ample time to climb freely indoors or outdoors they may structure their week as such:
| Day | Workouts |
|---|---|
| Monday | Rest |
| Tuesday | Aerocap x 1 |
| Wednesday | Regen x 1 |
| Thursday | Aerocap x 1 |
| Friday | Rest |
| Saturday | Open Climbing |
| Sunday | Open Climbing |
Frequently Asked Questions
Rest days should be used for recovery in order to make the adaptations you want. Make sure to eat well and stick to lighter physical activities if possible. Rest weeks are relative REST weeks! Just because you don't have lots of training, don't go bonkers and get too tired from doing other things. It is okay to climb for fun a bit more on rest weeks but make sure you don’t over do it.
If you have spare time, great! It is totally fine to add additional climbing into your plan as long as your body is recovering well. If you have additional time, we would recommend focussing on skills based practices and climbing at your limit at the start of training session before structured training. Alternatively, if you are finding that you cannot fit everything into your schedule, it will be key to reduce the training and focus on the stimulus you need the most to improve. Try reducing several workouts by half (half the sets) to begin with. If this is still too much, eliminate a workout which is less inline with your goal, i.e. AeroCap for someone working towards a bouldering goal.
It's okay - it happens to everyone. A missed workout for a given week will show up as either Red (Not Completed) or Yellow (Partially Completed) in your training plan tracking. If you miss a workout, you can either make it up later in the week or simply skip it. If you miss a workout, we recommend that you do not try to make it up the following week. Instead, simply continue with the next scheduled workout.
We understand that you may wish to climb outside during your training plan. We would like to confirm that you can certainly climb outside during a training cycle on top of your scheduled sessions. If you feel you do not have the time to climb outside as well as training, please follow the rules below:
- If physical gains are your priority = limit outdoor climbing to rest days and rest weeks. Do not push too hard during these sessions and prioritize recovery for training.
- Outdoor climbing is your priority = adapt training. We understand the important skill aspects of climbing outside and maintaining motivation throughout a training cycle. In this circumstance you can either train outside using the same workouts which can be adapted to your local crag or replace training workouts with outdoor climbing.
- Trad climbing or easy sport can replace endurance workouts
- On-sight sport, red-point sport attempts and fast boulder mileage can replace aerobic power workouts.
- Working routes in small sections or hard bouldering can replace strength/power workouts or anaerobic capacity workouts
Services offered by Crimpd Ltd. involve a risk of injury. It is important that you are aware of what to do upon the onset of a potential injury or injury. In order to uphold the terms of use of any service offered by Crimpd Ltd. you must follow the procedures below. On the onset of injury or potential injury cease all activities associated with the services or products of Crimpd Ltd.
- Seek medical advice
Do not continue to complete any activities associated with the services or products of Crimpd Ltd.